快速學習課程: https://www.youtube.com/watch?v=rNQIA0Fe9KQ&list=PLbOfcOk7bN42Kzp1wQsoLuU0vPUmFBe-X
第一課:
vue-cli > create-vue
vscode擴充工具vetur > volar
vuex > pinia
vue3完全不支援ie
1. composation api寫法 > 推薦 (不用this去取得其他datas, methods)
2. options api 寫法 > 相對來說較像vue2,適合原vue2升vue3但有時程壓力時使用(要this)
不建議混合使用!
vue3底層是vite

=

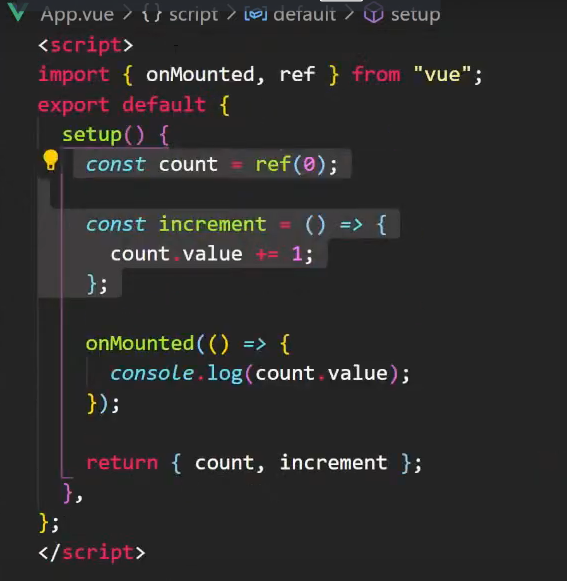
利用setup語法糖(必須是vite底層才能用),少寫export default{ ... return {..}}
跟components:{}
跟 props:{} 改成 const props= defineProps({})
第二課: 熟悉寫法
destory(){} > onUnmounted(()=>{})
將一個ref賦予到reactive的值裡,ref會自動被解包
<script setup>
import { computed } from "@vue/reactivity";
import {ref, onMounted, onUnmounted, watch} from "vue";
import { useRouter } from "vue-router";
const router = useRouter();
conat count = ref(1);
const name = ref("mike"); // ref()才會響應在畫面,其中可放任何型別的資料,不能用watch監控其children data的改變(除非加上深度監聽的參數)(這是指如果把object, array放進ref會無法在watch時監聽)
const data = reactive({ // reactive也會響應在畫面,只能用object, array型別,能用watch監控其children data的改變
name: David
})
const plusOne = computed({
get:() =>{
return count.value; // 取ref的值需要.value
},
set:(val)=>{
count.value = val;
},
})
console.log(plusOne.value) // 1
plusOne.value = 5;
console.log(plusOne.value) // 5
console.log(count.value) // 5 (computed裡改的ref也會一起改)
const changeName = () => {
name.value = "Jason"
}
onMounted(()=>{
})
</script>
### 下面這個非常重要
The reactive conversion is "deep": it affects all nested properties. A reactive object also deeply unwraps any properties that are refs while maintaining reactivity.
const count = ref(1)
const obj = reactive({})
obj.count = count
console.log(obj.count) // 1
console.log(obj.count === count.value) // true
第三課: defneProps, defineEmits
parent component:
<script setup> // setup語法糖讓我們不用寫export default 和 return
import Children from "./xxx";
import {ref } from "vue";
const resInt = ref(0)
const callBack = (res)=> {
resInt.value = res
}
const callBack2 = (res)=> {
console.log(res)
}
</script>
<vImg
alt="Vue logo"
className="logo"
src="xxxx"
width="125"
height="125"
/>
<Children @AddInt="callback" @returnName="callback2" />
children component:
<script setup>
const props = defneProps(["alt", "className", "src", "width", "height"]);
const props2 = definedProps({
alt: {
type: String,
default "Img alt"
}
obj: {
type: Object,
default: () => ({}) // 官方說定義object時會希望用函式回傳的方式定義一個乾淨的obj, 這個語法糖等同()=>({return ...})
// 而不是寫成 default:{}
},
arr: {
type:Array,
default: () => []
},
testFn: {
type: Function, // 直接把func傳下來,one way data flow
default: () => {}
},
}
const emit = defineEmits(["AddInt"]);
const emit2 = defineEmits({
returnName:(payload) => {
if(payload === "mike") {
return true;
} else {
return false
}
}
});
const handleAddClick = (a, b) => {
emit("AddInt", a + b);
emit("returnName", "mike");
}
</script>
<template>
<img
:alt="props.alt"
:className="props.className"
:src="props.src"
:width="props.width"
:height="props.height"
/>
<button @click="handleAddClick(3,4)" />
</template>
第四課:
listen to change event表示輸入框還在focus狀態時但有改變就還沒觸發change
listen to input event表示輸入框還在focus狀態時但有改變就已觸發input
v-model.lazy是change行為
v-model is used on customedComponent, customedComponent內部接收如下
<script setup>
defineProps(['modelValue']) // children component固定接收到的參數名
defineEmits(['update:modelValue'])
</script>
<template>
<input
:value="modelValue"
@input="$emit('update:modelValue', $event.target.value)"
/>
</template>
第五課:composables
1.
// composables folder > useWindowPosition.js (像以前的mixins)
import { ref, onMounted, onUnmounted } from 'vue'
export function useWindowPosition() { // 建議跟檔名相同名稱
const x = ref(0)
const y = ref(0)
const movePosition = (event) => {
x.value = event.pageX
y.value = event.pageY
})
onMounted(() => {
window.addEventListener("mousemove", movePosition)
})
onUnmounted(() => {
window.removeEventListener("mousemove", movePosition)
})
return { x, y }
}
// 欲使用的vue檔裡如下寫入
import { useWindowPosition } from "./composables/useWindowPosition.js";
const {x, y} = useWindowPosition();
console.log(x, y)
2.
// composables folder > useSetData.js
import {ref, readonly} from "vue";
export function useSetData(val) {
const x = ref(val);
const setData = (a) => {
data.value = a;
}
return {
data: readonly(data),
setData // 這種作法讓想修改data的一定要使用setData,規範較統一
}
}
3. 此方式也可用來拆出fetch api
第六課:pinia(composation寫法沒有state, get, action了,就composation寫法,就不用額外記pinia寫法)
// store/counter.js (mutation沒有了)
import { defineStore } from 'pinia'
import { ref } from "vue
// 以下是類似composition api的寫法
export const useCounterStore = defineStore("counter", ()=>{
const counter = ref(0); // state
const doubleCount = computed(() => { // getter
return counter.value * 2;
}
const addCount = () => { // action
counter.value++;
}
return {
counter, doubleCount, addCount
}
})
// 以下是類似options api的寫法,相對來說不推
export const useCounterStore = defineStore({
id:"counter", // 每個store都需要給id
state: () => ({
counter: 0
}),
getters: {
doubleCount: (state) => state.counter * 2
},
actions: {
addCount() {
this.counter++;
},
},
})
// App.vue
<script setup>
import { useCounterStore } from "./store/counter.js";
const store = useCounterStore();
const clickAdd = () => {
store.addCount();
}
<script>
<template>
<h1>{{ store.counter }}</h1>
<button @click="clickAdd">click</button>
</template>
或是想解構寫的簡潔則如下
<script setup>
import { storeToRefs } from "pinia";
import { useCounterStore } from "./store/counter.js";
const store = useCounterStore();
const { addCount } = store; // 解構,不能用在資料如state, getter
const { counter, doubleCount } = storeToRefs(store); // 用在資料如state, getter
const clickAdd = () => {
addCount();
}
watch(doubleCount, (newVal, oldVal) => { // 如果要深度watch要加上deep
console.log(newVal);
console.log(oldVal);
})
store.$subscribe((mutation, state) => { // .$subscribe直接就是深度watch
// import { MutationType } from 'pinia'
mutation.type // 'direct' | 'patch object' | 'patch function'
// same as cartStore.$id
mutation.storeId // 'cart'
// only available with mutation.type === 'patch object'
mutation.payload // patch object passed to cartStore.$patch()
})
<script>
<template>
<h1>{{ counter }}</h1>
<button @click="clickAdd">click</button>
</template>
P.S.可以在./store/counter.js import另一個store去做處理
第七課
naive ui
第八課:router
import { createWebHistory, createRouter } from "vue-router";
import HomePage "@pages/HomePage.vue";
Vue.use(VueRouter)
const router = createRouter({
history: createWebHistory(), // 需要主機配置https://router.vuejs.org/zh/guide/essentials/history-mode.html#nginx,否則丟上主機router.push會壞掉。如果主機無法配合,可用createWebHashHistory(),但網址上會有#。
routes: [
{
path: '/',
component: HomePage,
name: 'HomePage',
},
{
path: '/about',
component: () => import("@pages/HomePage.vue"), // 直接用函式載入,是動態的載入方式,只有在要切換時才會載入,適合用在靜態檔等確定載入時間不長的頁面
name: 'About',
},
{
path: '/:id', // 記得這個放最後面
component: () => import("../views/[id].vue"), // [id].vue 是一種動態網址的命名方式
name: 'userData',
},
{
path: '/:domain(.*)*', // 記得這個放最後面
component: import("../views/404.vue"),
name: 'NotFound',
},
})
// App.vue
<script setup>
import { RouterLink, RouterView, useRouter } from "vue-router";
const router = useRouter(); // route是參數,router是動作
setTimeout(()=>{
router.push("/about");
},3000)
</script>
<template>
<RouterLink to="/">Home</RouterLink>
<RouterView>
</template>
第九課
nuxt 3 前導
1.
在App.vue加入<NuxtPage />就可以把在pages folder下的 有其相對route設定,如下
index.vue 對應 /
about.vue 對應 /about
[id].vue 對應 /:id
2.
const route = useRoute(); 即可,不用import route相關的東西,nuxt3自動引入
P.S. ref也自動引入,不用import
P.S. component也自動引入,不用import
P.S. composables也自動引入,不用import
P.S. 應該都可自動引入,有疑問再查文件
3.
npx nuxi add component TheHeader // 用指令創建components folder 及其下TheHeader.vue
4.
asyncData => useAsyncData // 只能在page裡用
axios => ohmyfetch (axios在server端好像不能用了)
// index.vue
<script setup>
const {data} = await useAsyncData("idName".() => { // 不用async了
$fetch("api url") // nuxt3整合了ohmyfetch, https://www.npmjs.com/package/ohmyfetch
})
參考網站:
https://vuejs.org/
https://pinia.vuejs.org/
https://router.vuejs.org/
https://nuxt.com/


